
Table of Contents
A Simple Guide to Washing Your Zelus Weighted Vest: Keep It Fresh, Clean, and Ready for Your Next Workout
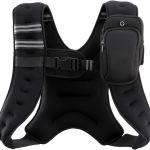
Your Zelus weighted vest is a powerful tool in your fitness journey, helping you to build strength, increase endurance, and push your limits. But just like any piece of workout gear, it takes a beating. It soaks up sweat, picks up dirt, and over time, can start to develop an unpleasant odor. Ignoring this can be a bad idea—not only for your hygiene but also for the longevity of the vest itself. A well-maintained vest performs better, lasts longer, and feels much more comfortable to wear. This comprehensive guide will walk you through everything you need to know, from the initial problem to a simple, step-by-step solution, ensuring your Zelus vest stays in peak condition for years to come.
TL;DR: The Quick and Easy Summary
For those who are short on time, here is the most important information boiled down into a few key points.
- Remove the weights: This is the most crucial step. The Zelus weighted vest is designed with removable sandbags or plates. Always take these out before washing.
- Hand-wash is best: The safest and most effective method is to hand-wash the vest in a tub or large sink.
- Use mild soap: Use a gentle, mild detergent. Avoid harsh chemicals, bleach, or fabric softeners, as these can damage the vest’s fabric.
- Air-dry completely: Never put your Zelus weighted vest in a machine dryer. Instead, hang it in a well-ventilated area away from direct sunlight to air-dry completely.
- Spot clean for quick fixes: For minor dirt or sweat, you can simply use a damp cloth with a little bit of mild soap to spot clean the affected area.
This short summary gives you the core steps. The rest of this article will dive into each point in extensive detail to ensure you have all the knowledge you need for a perfectly clean and fresh vest every time.

Understanding the Problem: Why Your Weighted Vest Needs a Good Cleaning
You’ve just finished a killer workout. You’re soaked in sweat, your muscles are burning, and you feel accomplished. Your Zelus weighted vest, your faithful training partner, is also a bit… damp. While it might seem easy to just toss it in a corner to dry until your next session, this is where the trouble begins.
The primary problem is the combination of sweat, dirt, and bacteria. Sweat itself is mostly water and salt, but it creates a warm, moist environment that is a perfect breeding ground for bacteria. As these bacteria grow on the fabric of your vest, they begin to break down the organic compounds in the sweat, producing the foul odors we associate with dirty workout clothes. If left unchecked, this bacterial growth can lead to more than just a bad smell. It can also cause skin irritation, rashes, or even minor infections. Think about it: you’re strapping a damp, bacteria-filled garment directly to your skin. Regular cleaning is a form of proactive hygiene, protecting both your skin and your health.
Beyond the hygiene aspect, the buildup of sweat and dirt can actually degrade the materials of your vest over time. The Zelus vest is made with durable, double-stitched craftsmanship to prevent sand leakage and endure intense workouts. However, constant exposure to sweat without proper cleaning can weaken the fabric fibers, break down elastic components, and even compromise the integrity of the stitching. The salt in your sweat can be corrosive, and if it’s allowed to crystallize in the fabric, it can make the material brittle and rough. This not only shortens the lifespan of your vest but can also make it less comfortable and more prone to wear and tear.
Lastly, there’s the simple psychological factor. A clean, fresh vest feels good to put on. It motivates you for your workout and makes the experience more enjoyable. A smelly, stiff, and dirty vest is a turn-off and can be an easy excuse to skip a workout. By understanding these issues, you can see that cleaning your Zelus weighted vest isn’t just about making it smell better—it’s about maintaining a piece of essential fitness equipment that is designed to last.
Solution 1: The Deep Clean – A Step-by-Step Guide to Hand Washing
Hand washing is the gold standard for cleaning a Zelus weighted vest. It’s gentle on the material, allows you to target specific areas, and prevents any potential damage that a washing machine might cause. This process is simple and only takes a few minutes of active cleaning time, with the rest of the time being passive drying.
Step 1: Remove the Weights – The Most Critical Action
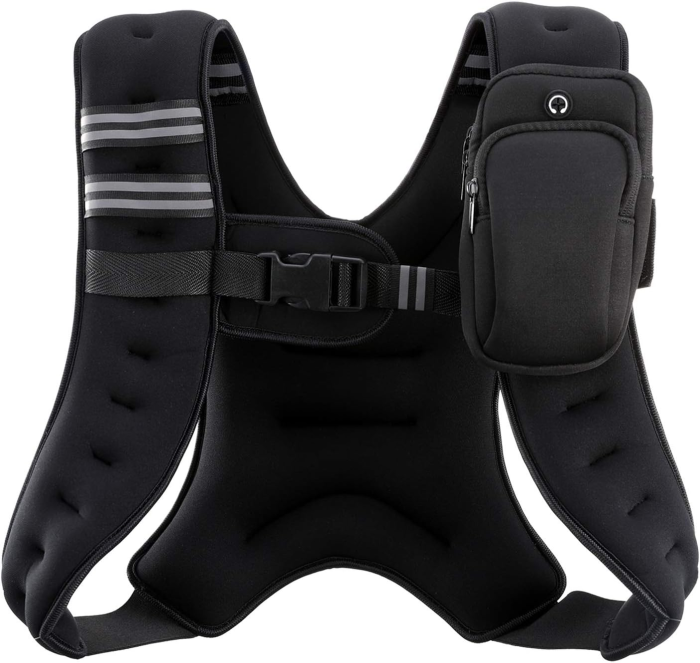
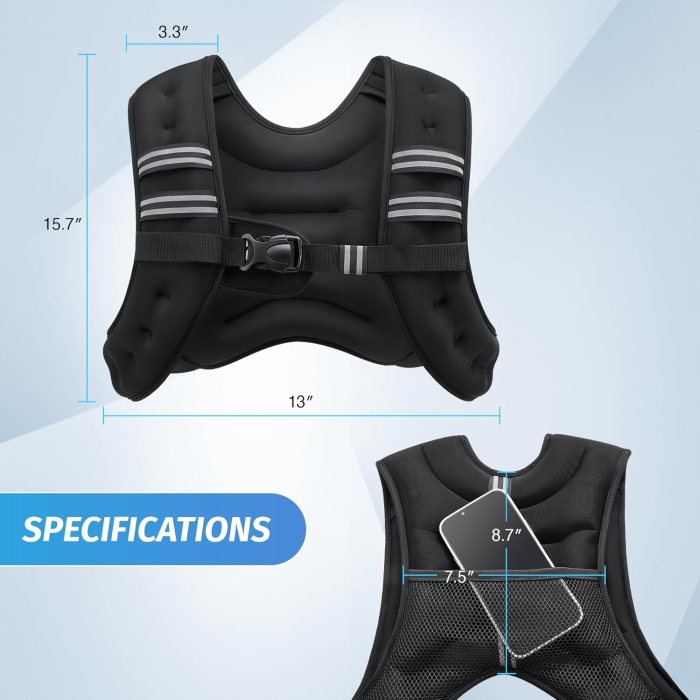
Before you do anything else, you must remove all the weights from the vest. The Zelus vest is designed with individual pockets that hold the weighted inserts, which can be either sandbags or small metal plates. Attempting to wash the vest with these weights still inside can cause several major problems.
- Damage to the vest: The sheer weight of the inserts can stretch and tear the fabric when wet, especially during the rinsing and wringing process. The constant shifting and banging around of the weights can also damage the interior lining and stitching.
- Damage to the weights: While the sandbags and plates are durable, they are not designed to be submerged in water for extended periods. Water can seep into the sandbags, causing the sand to clump and become less effective. Metal plates, even if coated, can be susceptible to rust, which will not only ruin the plates but can also stain the vest’s fabric.
- Ineffective cleaning: The weights will prevent the water and soap from reaching all the nooks and crannies of the vest, especially the areas most affected by sweat and dirt. This will result in an uneven and incomplete clean.
To remove the weights, simply un-velcro or unzip the pockets and carefully slide each one out. Place them in a dry, safe location away from the washing area. Once the vest is completely empty, you can proceed to the next step.
Step 2: Prepare the Washing Solution
This step is all about using the right cleaning agents. Harsh chemicals are your enemy here, as they can break down the fabric, strip away any protective coatings, and cause discoloration.
- Choose a container: Find a clean tub, a large sink, or a bucket that is big enough to fully submerge the vest.
- Fill with water: Fill the container with a few inches of cold or lukewarm water. Avoid hot water, as high temperatures can damage the synthetic fibers of the vest.
- Add mild detergent: Add a small amount of a gentle, mild laundry detergent. Think about what you would use for delicates or baby clothes. A sports detergent designed to combat odors is also a great choice. Do not use bleach, chlorine-based products, or fabric softeners. Bleach is far too harsh and will ruin the material. Fabric softeners can leave a residue that clogs the pores of the fabric, trapping odors and reducing its breathability.
Step 3: Submerge and Scrub
Now it’s time to get your hands dirty. Fully submerge the vest in the soapy water, making sure every part is saturated. Let it soak for about 10-15 minutes to give the detergent time to break down the dirt and lift the sweat.
After the short soak, you’ll perform the actual scrubbing.
- Use a soft tool: Use a soft-bristled brush (like a toothbrush or a gentle cleaning brush) or a clean cloth to gently scrub the surface of the vest.
- Focus on key areas: Pay special attention to the areas that get the most sweat: the shoulder straps, the inner lining, the chest area, and the parts that sit directly on your back. For any stubborn stains, you can apply a tiny bit of detergent directly to the spot and gently rub it in with your fingers before scrubbing.
Step 4: Rinse Thoroughly
This is a critical step to ensure no soap residue is left behind, which can attract bacteria and cause skin irritation.
- Empty the dirty water: Drain the soapy water from the tub or sink.
- Rinse with clean water: Refill the container with clean, cold water and submerge the vest again. Swish it around to wash away the soap. You may need to repeat this process a few times until the water runs clear and you can no longer see any suds.
- Gently squeeze: Once rinsed, gently squeeze the excess water out of the vest. Do not wring or twist the vest aggressively. This can stretch the fabric and damage the stitching. Instead, press down on the vest with your hands or roll it up like a towel to remove as much water as possible.
Step 5: Air Dry – Patience is a Virtue
This final step is non-negotiable. Putting a wet or even slightly damp vest back on can lead to mildew and bacterial growth.
- Find a good spot: Hang the vest in a well-ventilated area. This could be in your laundry room, on a clothesline in the shade, or even on a sturdy hanger in a room with a fan.
- Avoid direct sunlight and heat: Never put your vest in a machine dryer. The heat will shrink and damage the material, especially the synthetic fibers and any plastic buckles or straps. Likewise, avoid hanging it in direct, scorching sunlight for prolonged periods, as the UV rays can cause the colors to fade and the fabric to become brittle.
- Ensure it’s bone-dry: Let the vest hang until it is completely, 100% dry. This may take 24-48 hours depending on humidity. You can periodically feel the inside and the thickest parts to make sure there’s no remaining moisture. Once it’s fully dry, you can reinsert the weights.
Solution 2: The Quick Fix – Spot Cleaning for Maintenance
Hand washing is perfect for a deep clean every few weeks, but for everyday maintenance, you can use a simpler method called spot cleaning. This is ideal for when you’ve had a light workout or want to quickly address a small spill or stain.
The Spot Cleaning Process
- Mix a cleaning solution: In a small bowl, mix a few drops of a mild laundry detergent with cool water.
- Dampen a cloth: Dip a clean cloth or sponge into the solution and wring out the excess. The cloth should be damp, not soaking wet.
- Wipe the vest: Gently wipe down the interior and exterior of the vest, focusing on areas with sweat marks or dirt.
- Rinse with a clean cloth: Use a separate, clean cloth dampened with only water to wipe away any soap residue.
- Air-dry: Hang the vest in a well-ventilated area until it is completely dry.
This method is quick and effective for regular upkeep, preventing odors from setting in and reducing the need for a full hand-wash.
Challenges and Common Mistakes to Avoid
Even with the best intentions, it’s easy to make a mistake that could damage your Zelus weighted vest. Being aware of these common pitfalls can save you from a lot of frustration and keep your vest in excellent shape.

- Using a Washing Machine or Dryer: As mentioned before, this is the most common and damaging mistake. The vigorous spinning and agitation of a washing machine can rip seams, dislodge stitching, and cause the vest to lose its shape. The high heat of a dryer can melt or warp the fabric, elastic straps, and plastic buckles. The Zelus weighted vest is specifically designed for hand washing, and straying from that recommendation is a guaranteed way to shorten its lifespan.
- Not Removing the Weights: Forgetting to take out the weighted inserts is another critical error. Washing a weighted vest with the inserts still in can damage both the vest and your washing machine (if you were to ignore the first rule). The weight can cause imbalance in a washing machine, leading to loud banging and potential mechanical failure. It also prevents the vest from being properly cleaned and dried.
- Using Harsh Chemicals: While you might think a strong bleach or a harsh chemical cleaner is the best way to get rid of odors, the opposite is true. These chemicals are corrosive and can completely break down the vest’s synthetic fabric, leading to holes, discoloration, and a loss of structural integrity. Stick to mild, gentle detergents and you’ll be much safer.
- Incomplete Drying: This is a silent killer. If you put your weights back in or store the vest while it’s still damp, you are creating the perfect environment for mold and mildew to grow. Not only does this produce a persistent, musty smell that is incredibly hard to remove, but it can also be a health hazard. Always make sure the vest is bone-dry before reassembling it.
- Improper Storage: Once your vest is clean and dry, how you store it matters. Don’t throw it in a gym bag while it’s still damp or crumple it up in a closet. Hang it in a dry, cool place where it can breathe. This prevents it from getting dusty and ensures that any lingering moisture can evaporate, keeping it fresh for your next workout.
Conclusion: A Clean Vest is a Happy Vest
Your Zelus weighted vest is more than just a piece of equipment; it’s an investment in your fitness goals. By taking a little time to care for it properly, you can ensure that it serves you well for countless workouts to come. The process is simple: remove the weights, hand-wash with a mild detergent in cool water, rinse thoroughly, and air-dry completely. For daily maintenance, a quick spot clean is all you need.
By understanding the “why” behind these steps—the importance of hygiene, preventing material degradation, and avoiding common mistakes—you can turn a simple chore into a mindful part of your fitness routine. A clean, fresh, and well-maintained weighted vest is not only more comfortable and hygienic but also a testament to your commitment to both your fitness journey and the gear that helps you get there. So go ahead, give your Zelus vest the care it deserves, and get ready for your next big workout. You’ve earned it.